We always judge a tool, product, or service by its capability to handle a load.
Even a weightlifter is determined to be the strongest only by their capability to beat others by lifting the most weight successfully.
The same outcome is expected from an API.
Because an API that worked perfectly in the development environment can struggle under real-world traffic if we don’t know its limitations.
It’s not a code issue—it’s a performance blind spot. Performance testing isn’t just a checkbox; it’s how you plan to protect and ensure reliability at scale.
Studies show a 1-second delay can cut conversions by 7%. It’s not just an issue then it’s revenue loss.
In this guide, we’ll walk you through how to integrate performance testing into your API development cycle—and why taking the easy route could cost you more than just downtime.
What is API performance testing, and why is it important?
Imagine if Slack’s public API handles millions of messages every hour. If it lagged for just a second, just imagine the payment defaults!
In simple words, API performance testing is the process of simulating various loads on your APIs to determine how they behave under normal and extreme conditions. It helps answer:
• How fast are your APIs?
• How much load can they handle?
• What are the problems affecting performance?
Different types of performance tests help you understand your API’s limits. Here’s a breakdown:
| Testing Type | Purpose |
|---|---|
| Load Testing API | Test normal traffic to check speed and errors. |
| Stress Testing API | Pushes the API beyond its limits to find breaking points. |
| Spike Testing API | Tests sudden traffic surges, such as those during a product launch. |
| Soak Testing | Runs tests over hours or days to spot memory leaks or slowdowns. |
| API Throughput Testing | Measures how many requests per second (RPS) the API can handle. |
| API Response Time Testing | Checks how quickly the API responds under different loads. |
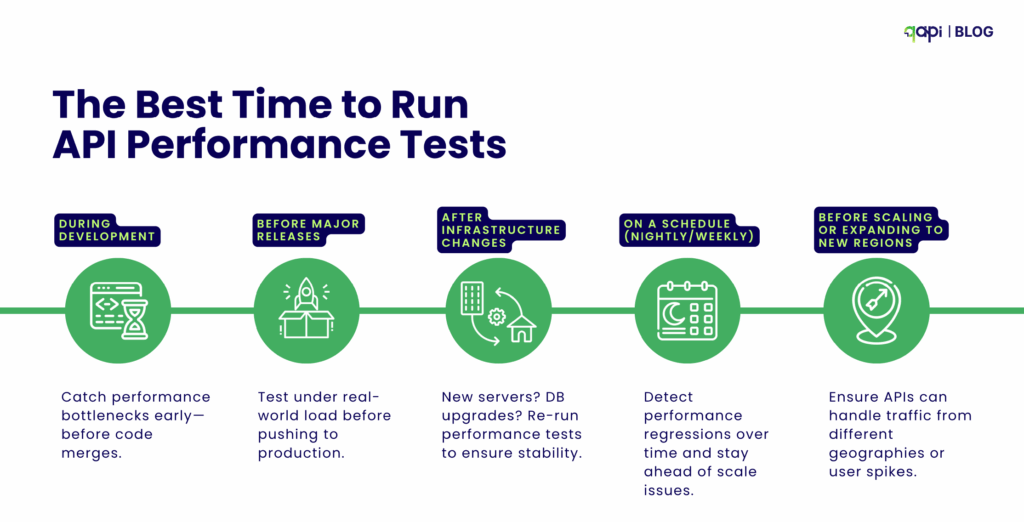
What’s the best time to run API performance testing?
Performance testing should be part of your API development process, because as your application grows you are more likely to provide a poor user experience if issues are not addressed early. It is a good practice, and it is also recommended that you test at these stages:
• Once it’s working but not yet perfect.
• Before it hits the big stage (aka production).
• Ahead of busy times, like a product drop.
• Regularly, to keep it sharp and to monitor performance over time.
Why Virtual User Simulation in matters API Testing
Virtual user Balance (VUB) simulation is at the core need of performance testing. It involves creating and executing simulated users that interact with your API as real users would.
Here’s why virtual user simulation is your next best friend:
- Recreating Real-World Scenarios: Virtual users are designed to replicate the actions of human users, such as logging in, browsing, submitting forms, or making transactions. By simulating a large number of concurrent virtual users at once, you can accurately get an idea of real-world traffic patterns and test your API under real conditions.
- Cost-Effectiveness: Hiring or coordinating a large number of human testers for performance testing is impractical and expensive. Virtual user simulation provides an economical way to generate high traffic and assess performance at a fraction of the cost.
- Shift-Left Testing: Developers can shift left by using virtual APIs or mocked services to test their code for performance issues even before the entire backend system is fully developed, saving time and resources.
Schema-Driven Performance Testing (OpenAPI/Swagger)
One of the most talked about challenges in API performance testing is uncovered endpoints—those that are rarely tested due to lack of awareness, oversight, or incomplete test coverage. This becomes critical as your API grows in complexity, and traditional manual scripting becomes hard, it’s usually the case when API collection grows.
Schema-driven testing solves this issue by leveraging your OpenAPI/Swagger specification to automatically generate comprehensive test cases. These tests should describe every route, method, parameter, and expected behavior in your API, making them an ideal source for exhaustive performance coverage.
Why should teams do it:
• Saves Time and Reduces Human Error: Instead of manually identifying and scripting tests for each endpoint, automated tools can parse your schema and generate full performance test suites in minutes.
• Ensures Full Coverage: Guarantees that every documented route and method is tested—including edge cases and optional parameters.
• Adapts to Change Automatically: When your API schema evolves (new endpoints, fields, or methods), the generated test suite can be updated instantly, avoiding stale tests.
According to GigaOm’s API Benchmark Report, schema-driven testing can reduce API testing effort by 60–70% while significantly improving endpoint coverage and consistency.
How do I conduct performance testing for my API? A Step-by-Step Process
Step 1: Define Performance Criteria
• What’s an acceptable response time?
• What’s the expected number of users?
Set clear goals, for example:
Response time: Aim for under 500ms for 95% of requests.
Throughput: Handle at least 1,000 requests per second (RPS).
Error rate: Keep errors below 1% under load.
Step 2: Choose Your Performance Testing Tool
Select a tool that aligns with your team’s skills and needs. Here’s a comparison of popular options in 2025:
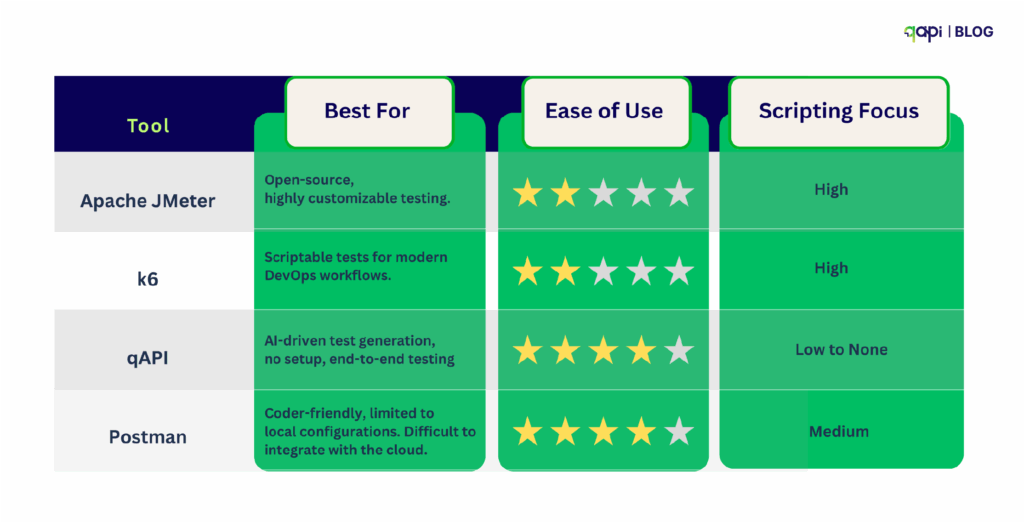
qAPI stands out for its AI-powered test generation, which creates performance tests from imported API specifications in minutes, making it perfect for teams that want fast setup.
Step 3: Simulate Load Scenarios
With qAPI’s virtual user balance feature, you can automatically optimize concurrent user distribution based on your API’s real-time performance characteristics, ensuring more accurate load simulation.
Let’s say for an e-commerce API, test 1,000 users browsing products, 500 checking out, and 50 retrying failed payments.
APIs rarely deal with static, uniform data. In reality, they handle dynamic data with varying structures and sizes, making it essential to recreate these input conditions.
To achieve this, randomized or variable data sets should be incorporated into tests.
Practical techniques for simulating varying payload sizes include:
1️⃣ Data Parameterization Use dynamic test data (from CSV, JSON, etc.) instead of hardcoding values into your tests
Why:
• It prevents false results caused by server-side caching
• Makes tests more realistic by simulating multiple users or products
Example: Each API request uses a different user_id instead of the same one every
2️⃣ Dynamic Payload Construction To automatically generate API request bodies with varying content, like longer strings, optional fields, or bigger arrays.
Why :
• Helps test how the API performs with different data shapes and sizes
• Shows bottlenecks that affect large or edge-case payloads
• Example: One request includes 10 items in an array,array; the next includes 100.
3️⃣ Compression Testing Send the exact requests with and without compression (like Gzip) enabled.
Why :
• Checks whether your API handles compressed payloads correctly
• Reveals speed gains (or slowdowns) with compression
• Helps validate behavior across your different client setups
4️⃣ Pagination Testing
Test API endpoints that return lists, with and without pagination
(like ?limit=20&page=2).
Why :
• Validates how well the API you created handles large datasets
• Shows whether response size and latency are managed correctly
• Useful for endpoints like /users, /orders, or /products
Step 4: Run the Tests & Monitor
Once you’ve decided your performance benchmarks and designed your load scenarios, it’s time to run the actual tests.
Hitting “Start” —it’s where the real learning begins.
Why Real-Time Monitoring Matters
As your API tests run, what you need isn’t just a pass/fail status—you need live insight into what’s happening.
That means you and your team must keep an eye on:
• Response times: How quickly is the API responding?
• Throughput: How many requests per second is it handling?
• Errors: Are any endpoints failing or slowing down?
Seeing this in real-time is crucial. It allows your team to:
• Spot problems while they happen, not hours later
• Quickly trace slowdowns to specific endpoints or systems
• Avoid production surprises by catching unstable behavior early
Monitoring Is More Than Just Watching
Real-time monitoring isn’t just about watching numbers climb or fall. It creates a feedback loop that improves everything:
• Did a spike in traffic slow down a key endpoint? Log it(qAPI logs it for you)
• Did memory usage shoot up after a test run? Time to optimize.
This data feeds your next round of testing, shapes future improvements, and builds a habit of continuous performance tuning.
Running performance tests without real-time monitoring is like flying without a clear view. That’s what qAPI provides you with:
• Faster issue detection
• Smarter optimization
• Stronger, more reliable APIs
So don’t just run tests—observe, learn, and evolve. That’s how performance stays sharp, even as your APIs scale.
Step 5: Optimize & Retest
Performance issues often come from various sources, including server-side code, database queries, network latency, infrastructure limitations, and third-party dependencies.
Once bottlenecks are identified, the best practice for API testing is to implement optimizations and then retest to validate their effectiveness.
This involves refining various aspects of the API and its supporting infrastructure. Optimizations might include tuning specific endpoints, optimizing database calls, implementing efficient caching strategies, or adjusting infrastructure resources.
As code changes, new features are added, and user loads evolve, new problems will emerge. This shows that performance testing must be a continuous practice rather than a single “fix-it-and-forget-it” approach.
An API that consistently performs well, even under changing conditions, provides a superior user experience and builds customer trust. So always-
• Tune endpoints, database calls, or caching
• Rerun tests until stable
API Testing Best Practices
Take note of the following best practices in API testing that will help you save time and also build your tests faster like never before-
Test in Production-Like Environments:
Your performance testing environment should mirror production as closely as possible.
Focus on Percentiles, Not Averages:
Average response time can be misleading. A 100ms average might hide the fact that 5% of your users wait 5 seconds.
Automate Performance Tests:
Integrate automation into CI/CD pipelines to enable early detection. Automated tests provide rapid feedback, allowing issues to be addressed before they escalate.
Define Clear Objectives & Benchmarks:
Set clear performance goals and acceptance criteria upfront. Without these your testing efforts will be unfocused, and results difficult to interpret.
Analyze Results Thoroughly:
Do not just run tests; dig deep into the data to identify root causes of performance issues.
Problems to Avoid when building an API performance testing framework:
Not Testing All Possible Scenarios: Assuming a few tests cover everything can leave significant gaps in coverage, leading to undiscovered bugs and issues.
Failing to Update Tests After API Changes: APIs are dynamic; neglecting to update tests after modifications can result in missed bugs or the introduction of new security vulnerabilities.
Ignoring Third-Party Integrations: External services can introduce unpredictable performance issues and bottlenecks. These dependencies must be accounted for in testing.
The best API Performance Testing Tool in 2025
qAPI is new to the market, it’s completely free to use, does not require coding, and moreover, you get end-to-end test analysis to judge your APIs without having to worry about technical specifications.
Why qAPI? It simplifies testing with AI, generating load and stress tests from Postman or Swagger collections in under 5 minutes, with built-in dashboards.
Want to Automate All This?
With qAPI, you can:
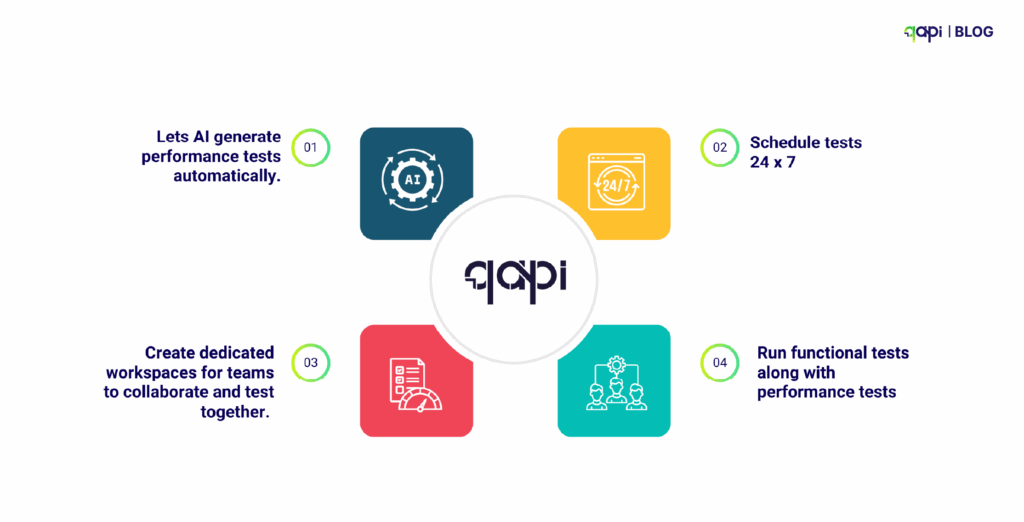
• Let AI generate performance tests automatically.
• Schedule tests 24 x 7
• Create dedicated workspaces for teams to collaborate and test together.
• Run functional tests along with performance tests
At Last…
In a world of rising microservices and multi-client environments, API speed and stability aren’t just keywords or fancy terms—they’re now basic expectations. API Performance testing lets you ship confidently, even at scale.
API performance testing is essential for building apps that users love.
Slow or unstable APIs can harm user experience, reduce retention, and incur costly fixes.
By testing early, using the right tools, and tracking key metrics, you can build APIs that are fast, reliable, and ready for growth.
In 2025, tools like qAPI, k6, and JMeter will make performance testing accessible and more powerful. Whether you’re handling a small app or a global platform, handling performance tests is easier and code-free with qAPI.
Ready to start? Try integrating performance tests into your next release cycle—or use tools like qAPI to automate the process entirely. Start here
FAQs
If you want a tool that does not need coding and can automate the test case generation process, then you should start using qAPI.
Performance testing for REST APIs focuses on evaluating RESTful endpoints under load. Key aspects include: Response time for GET, POST, PUT, DELETE. Latency and throughput under concurrent usage and Stateless behavior consistency. REST APIs are especially sensitive to payload size and HTTP method handling, making it essential to simulate real-world usage patterns during tests.
While Postman supports simple functional testing, it’s not ideal for high-scale performance testing. You can extend it using qAPI and scripts, but for better scalability and automated load testing.
Simulate real-world API load by using tools like qAPI, LoadRunner, or Jmeter to create virtual users and send concurrent requests.